iPad settings
Choose a voice, tune the touch response, pick a grid size and keep the iPad locked into the app.

Open Settings (press and hold)
- Press and hold the gear at the right end of the header row for two seconds. A quick tap only shows a reminder.
- Settings opens. When you are finished, tap Done at the top right.
The hold is there so that a curious communicator does not change the voice or grid by accident. It works like the pencil button for editing. VoiceOver users can choose the Open settings action instead of holding. For a real lock, add a code: see Set a settings passcode below.
Good to know: Every setting on this page is saved separately for each profile, so two children sharing one iPad can each have their own voice and grid size. See Profiles and backup.
Choose a voice
In the Speech section, tap Voice:
- Best available (the default) automatically uses the highest quality English voice installed on the iPad.
- MoCo Child is a natural child voice made for Model Communicator. It runs entirely on the iPad. You can also switch it on with the Natural voice (MoCo Child) toggle lower in the same section. The first word after switching may take about a second while the voice loads.
- Every other English voice installed on the iPad is listed by name. Better ones are marked Enhanced or Premium.
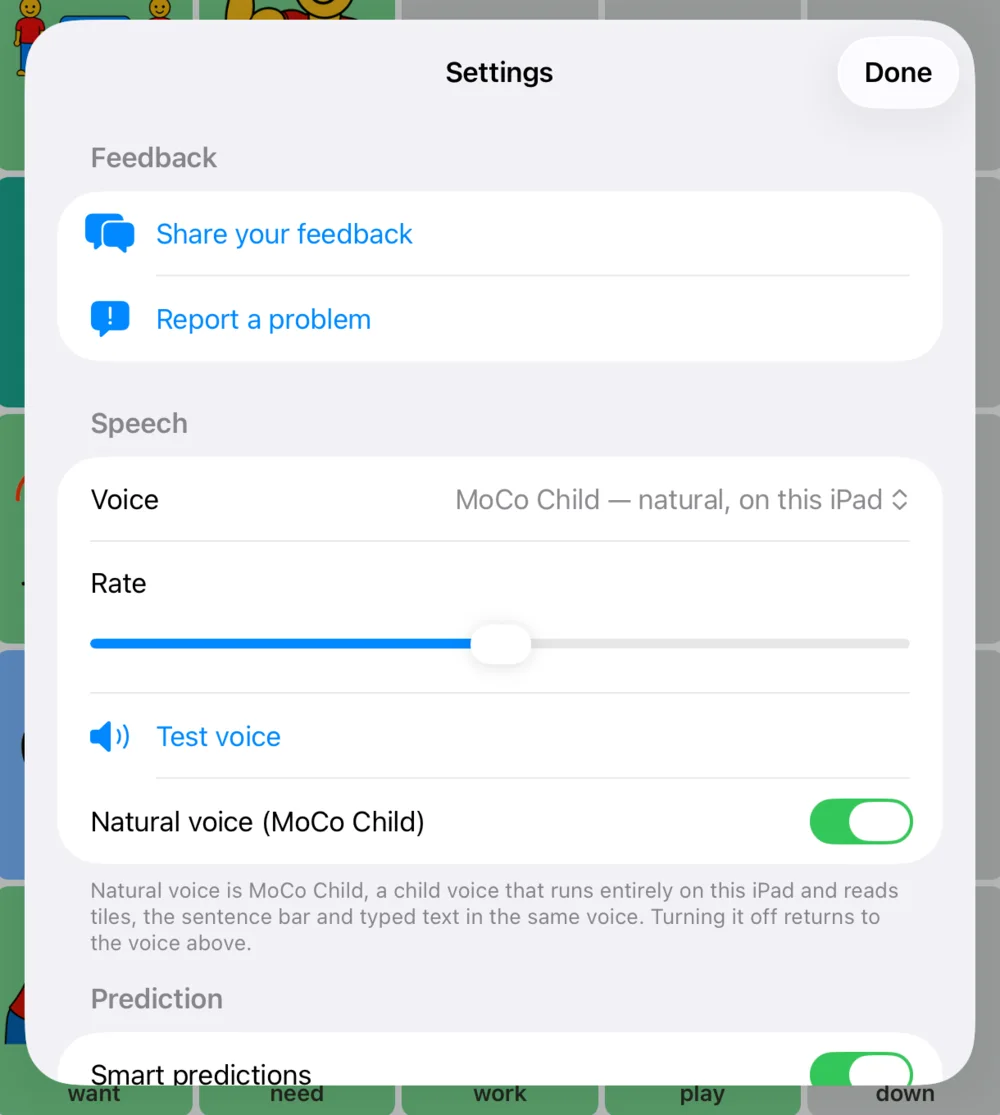
Use the Rate slider to slow speech down or speed it up, and Pitch to make a system voice sound higher or lower. (Pitch is hidden for MoCo Child.) Tap Test voice to hear "This is how I sound."
Get a better sounding system voice (free)
The voices that come on a new iPad are the small, robotic ones. Apple offers much better voices as free downloads:
- Leave Model Communicator and open the iPad's own Settings app.
- Go to Accessibility → Spoken Content → Voices → English.
- Pick a voice, then download its Enhanced or Premium version. These are large files, so use Wi-Fi.
- Return to Model Communicator. With Voice set to Best available the new voice is used automatically, or pick it by name.
Tip: Pick one voice and keep it. A voice is part of a person's identity, and hearing the same voice every day helps the communicator and everyone around them recognize it as theirs. Involve the communicator in choosing whenever you can.
Personal Voice
On iPads that support Apple's Personal Voice, a Personal Voice section appears in Settings. Personal Voice lets someone who can still speak record their own voice and keep using it, which matters for people with conditions such as ALS.
- Create the voice first in the iPad's Settings app under Accessibility → Personal Voice. Apple guides you through recording a set of phrases.
- In Model Communicator's Settings, tap Use My Personal Voice and allow access when the iPad asks.
- Choose the voice, marked Personal, in the Voice list.
If the section does not appear, that iPad or iPadOS version does not support Personal Voice. If you tapped Don't Allow by mistake, turn it back on in the iPad's Settings app under Accessibility → Personal Voice → Allow Apps to Request to Use.
Good to know: Apple does not allow a Personal Voice to be saved as an audio file. When a message is shared from the Share button, the audio clip uses the best system voice instead.
Word suggestion settings
- Smart predictions appears only on iPads with Apple Intelligence. It improves next-word suggestions using the language model built into the iPad. Nothing leaves the device. It is on by default where available.
- Allow adult language is off by default. While off, suggestions never include sexual or profane words. Leave it off for children and classrooms. Adult users may prefer it on. Slurs are never suggested either way.
Good to know: This setting only filters suggestions. It never blocks what a person can type on the keyboard or say with their tiles. The words belong to the communicator.
Make touch easier (tremor, double taps, stray touches)
The first Access section holds three touch options:
| Setting | Choices | When to use it |
|---|---|---|
| Speak each word when tapped | On (default) or off | Turn off for a communicator who prefers to build the sentence silently and then speak it all at once. |
| Ignore repeat taps | Off, 0.3, 0.5, 1 or 2 seconds | The same tile tapped again inside that time is ignored. Helps when a tremor or a bouncing finger produces want want want. |
| Hold to activate | Off, 0.3, 0.7 or 1 second | A tile only responds after it has been held that long. Helps when a hand drags across the screen on the way to the target. |
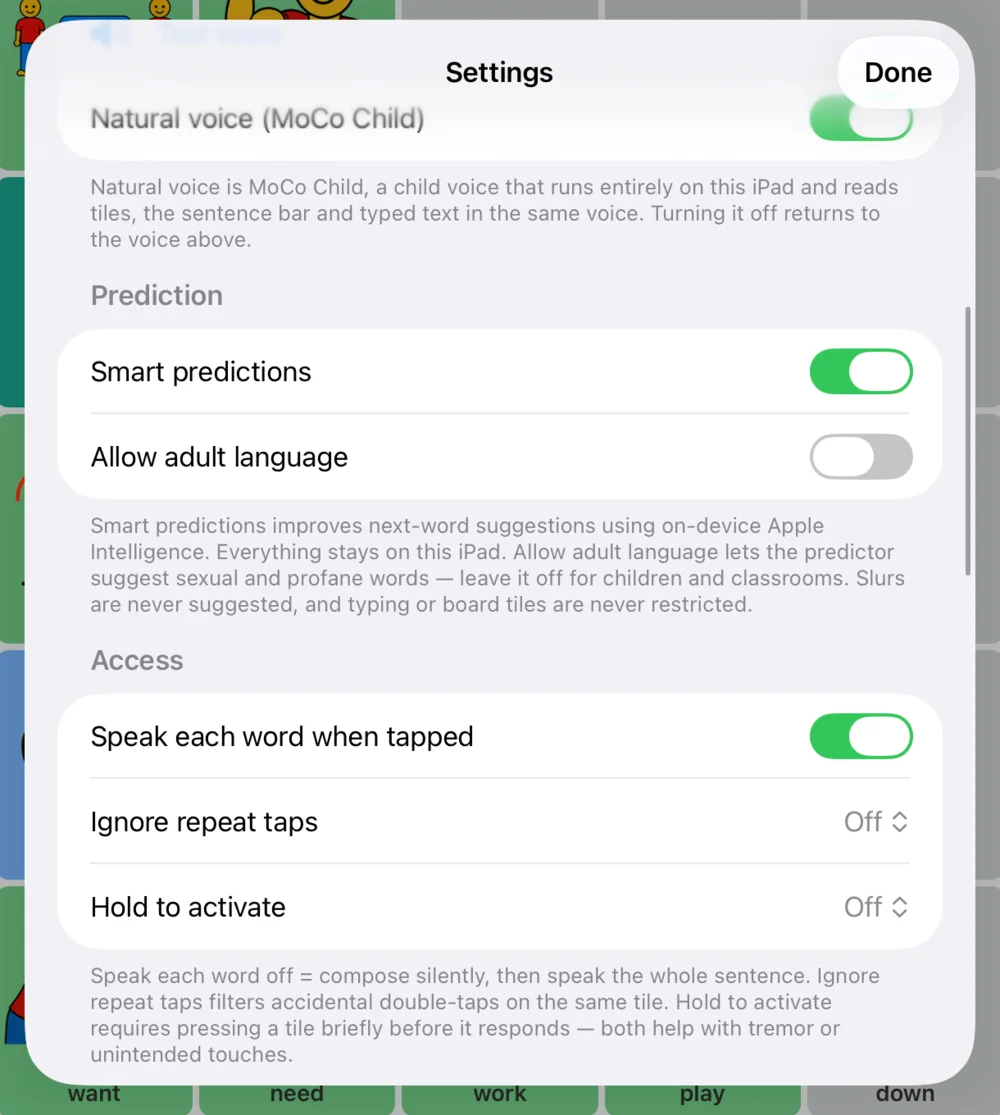
Start with the shortest time that fixes the problem. Longer delays make communication slower. Hold to activate applies to the word tiles. The message bar buttons and suggestions still respond to a normal tap.
For SLPs: VoiceOver and Switch Control activations are never delayed by these settings, so you can combine switch scanning with Hold to activate for a user who sometimes uses direct touch.
Message bar options
| Setting | Default | What it does |
|---|---|---|
| Tap words to edit | On | Lets the user tap any word in the message to speak, replace or delete it. |
| Return home after each word | Off | After a word is chosen inside a folder, jump back to the Home board. |
| Clear message after speaking | Off | After Speak, the message stays visible so a listener can read it, then clears itself when the next message is started. |
Choose a grid size
In Grid size, pick how many tiles are on each page:
| Board | Layout | Tiles per page |
|---|---|---|
| MoCo-25 | 5 × 5 | 25 |
| MoCo-42 | 6 × 7 | 42 |
| MoCo-48 | 6 × 8 | 48 |
| MoCo-60 (default) | 6 × 10 | 60 |
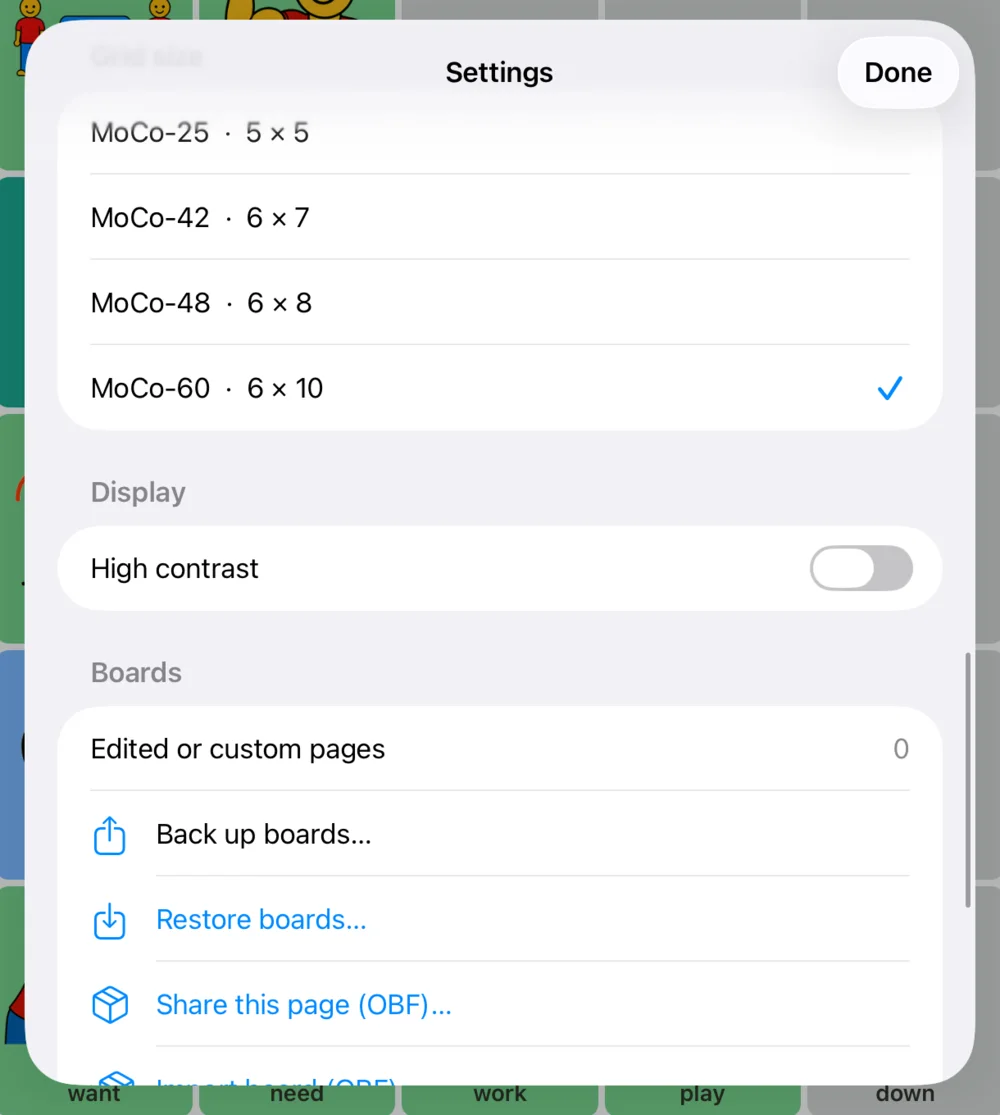
Changing the size loads that board's Home page. The smaller boards keep the same core words in the same relative positions, with fewer columns.
For SLPs: Choose the largest grid the person can see and touch accurately, not the smallest one they can "handle" cognitively. Words can be hidden and revealed over time while their positions stay fixed. Moving to a bigger grid later means relearning where every word lives.
High contrast
In Display, turn on High contrast for thicker dark tile borders and larger, bolder labels. It helps some users with low vision or cortical visual impairment, and it helps everyone outdoors in bright light.
Set a settings passcode
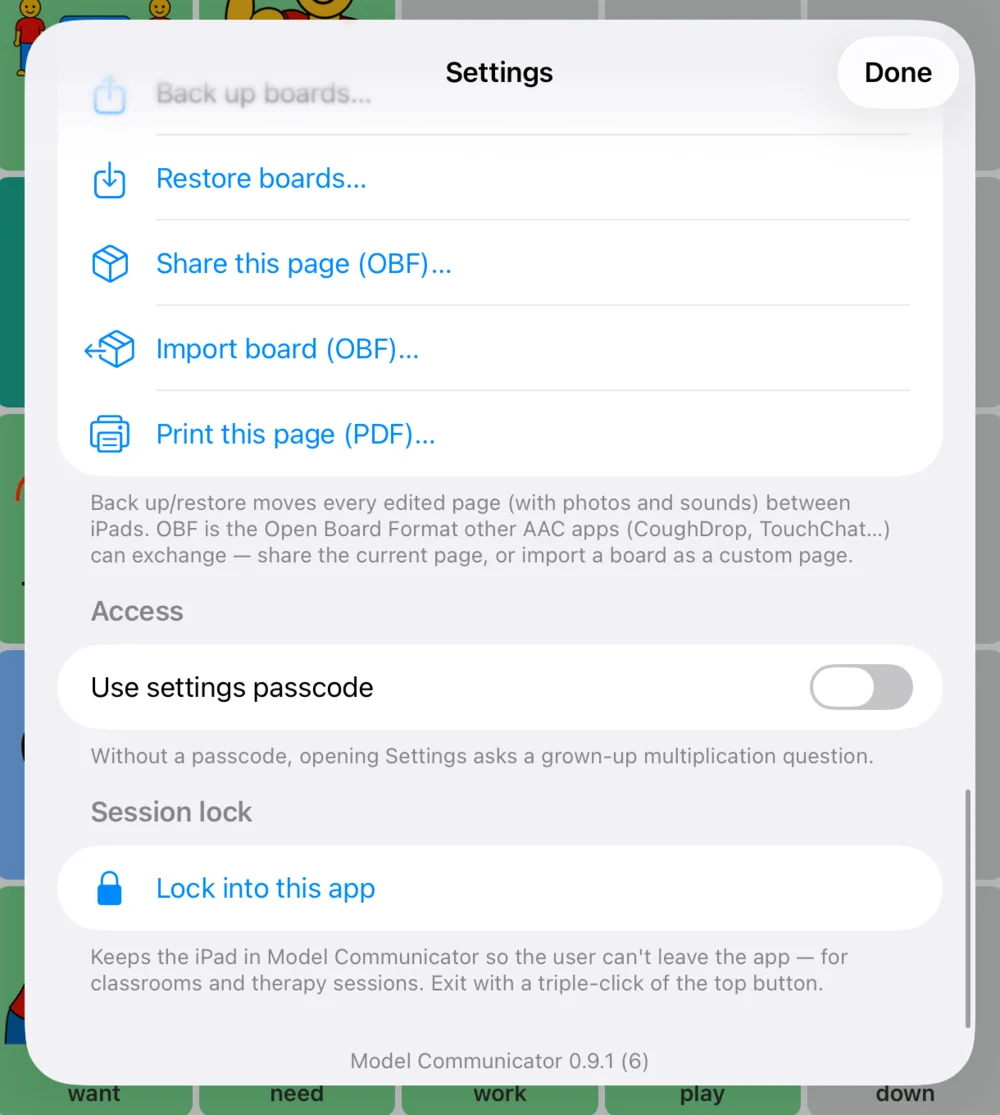
To ask for a code after the hold, scroll to the second Access section near the bottom of Settings:
- Turn on Use settings passcode.
- Type a 6-digit passcode.
- Tap Done. From now on, holding the gear asks for that passcode.
Heads up: Write the passcode down somewhere safe and share it with the rest of the team (family, SLP, teacher, aide). Pick a code that is different from the iPad's unlock code.
Keep the iPad locked into the app
During school or therapy you may want the iPad to stay in Model Communicator so it cannot be swiped away to games or videos. Apple's Guided Access does this. Set it up once:
- Open the iPad's Settings app and go to Accessibility → Guided Access. Turn it on.
- Tap Passcode Settings and set a Guided Access passcode.
- Open Model Communicator, then triple-click the top button (or the Home button on iPads that have one) and tap Start.
- To unlock, triple-click again, enter the Guided Access passcode and tap End.
In Model Communicator's Settings, under Session lock, Lock into this app reminds you of these steps. For a school iPad that should always stay in the app, the IT department can use Single App Mode instead. See the deployment guide.
Tip: A communication device should be available all day, not only during "talking time". Locking the iPad into the app is a good way to keep a shared iPad dedicated to communication.
Send feedback or report a problem
At the top of Settings, Share your feedback and Report a problem open short forms in the browser. These two links are the only part of the app that uses the internet. The version number is at the very bottom of Settings. Please include it when you report a problem.